Featured Post

Gallery Photos

I wanted to place all my favourite art felt in one place.... so enjoy!  Click on Gallery Photos title to see the whole lot!                 ...

Thursday, November 22, 2018

Nuno felt, wet felt hat. Tutorial

I remembered to take photos of my latest hat!  Here we go

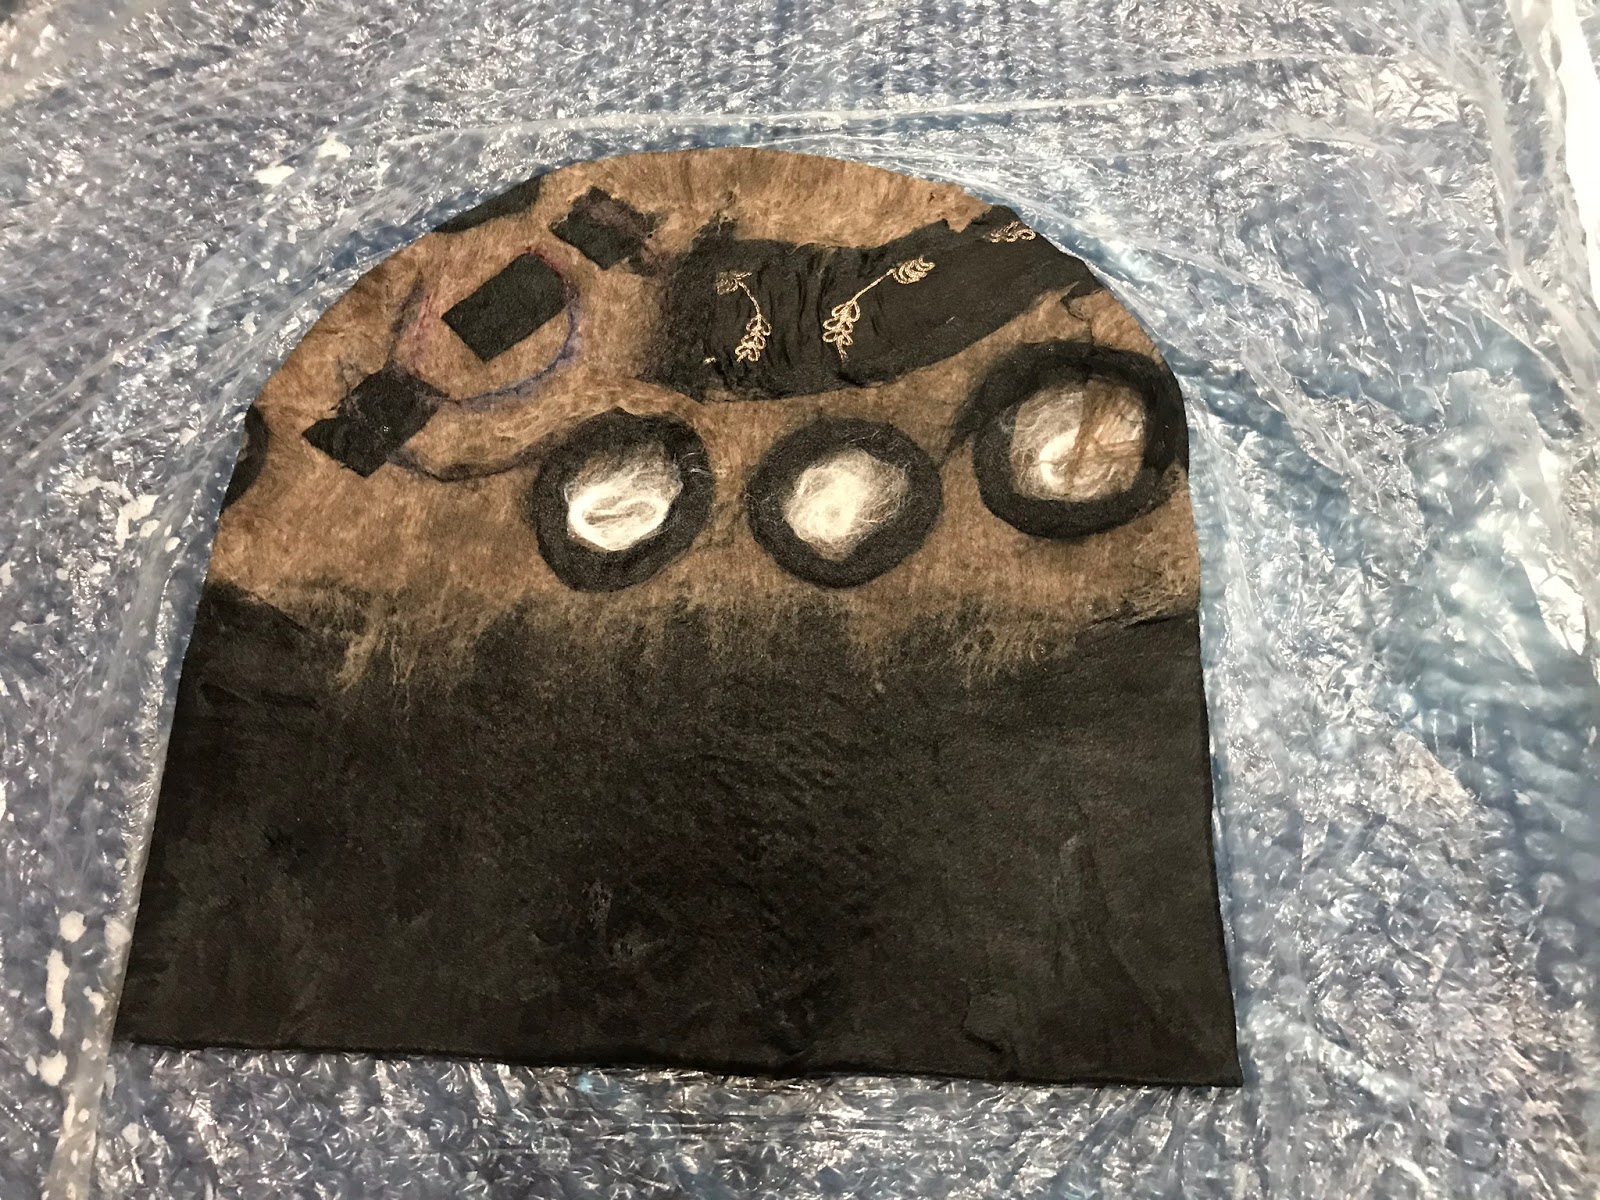
Starting with a plastic resist, I placed fibre over the edges in all directions, using black merino for the bottom half and medium natural merino for the top. Under the black bottom half I placed some black silk chiffon with gold embroidery (from a vintage sari I had in my stash).  This fabric was placed face down next to the resist, then covered with the black merino top.

When covered with two fairly thin and even layers of merino, I added some fabric (black chiffon with gold embroidery) and some prefelt squares and some black roving and white silk.
After wetting and flipping, the over the edge fibre is folded onto the resist and the second side worked like the first.  Notice the black fabric from the first side is smoothed onto this side, so that it will run from one side of the hat to the other.

Here it is all tucked in and wet.  Now it is rolled up and worked for a while until sturdy enough to full to size in hot, soapy water.  After cutting out the resist, I take time to shrink and stretch and shrink and stretch, to make the hat round where it was flat.  Stretching involves shaping over the hat forms and head forms I have.  (and trying on my head too)
Pins are used to hold the creases until drying is completed.    You can see how the silk embroidered fabric details the brim when it is flipped up.  I cut a cool and asymmetric shape in the brim and put a few pleats there.