Featured Post

Gallery Photos

I wanted to place all my favourite art felt in one place.... so enjoy!  Click on Gallery Photos title to see the whole lot!                 ...

Monday, April 15, 2019

Making Felt Rocks - tutorial


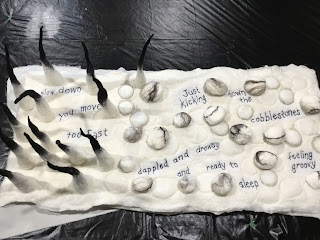
I wanted to make a few "rocks" for an art project, and thought it could be fun to show the process as a tutorial....  I made slightly larger ones (4-5 inches across) a couple of years ago for my baby grandson, and he quite enjoyed throwing them and fetching them all over my living room.
Here is a photo of rocks piled together drying on a towel.  Most are 2 - 3 inches long and less than one inch thick.  For kids you want them thicker, but for mounting on a wall hanging felt display, flat is best.
Start with a slab of foam, like you would use for seat cushions.  You can find them at a crafting or sewing shop.

For small rocks, cut a rectangle about 1 inch wide, and 3 inches long, using the 2 inch depth as is.  For larger rocks use 2 inch depth at your smallest side and cut 3 inches by 4 inches.
From the rectangle shape, use scissors to trim out all the sharp angles and corners, creating an oval shape and bevelling a bit of a curve to the edges.

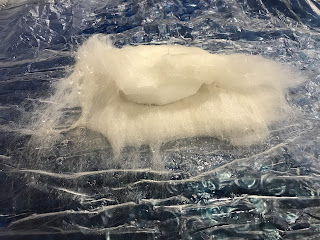
Lay your wool fibre in two layers, one in each direction on top of a layer of plastic, and on top of some bubble wrap.  Use grey, white, brown and even some yarn if you like, on the outside of the rock to create more details.  This one is just natural white.
Wet the fibre with warm water mixed with a bit of dish soap, and wrap evenly around the foam shape.


Roll the plastic around the wrapped rock and gently rub the package against the bubble wrap.  Keep flipping and rubbing in every direction, increasing the pressure of the rub as the fibre becomes more firm.  Eventually, when the surface is fairly firm you can take it from the plastic wrap, and rub it in every direction directly on the bubble wrap, dipping it into hot soapy water if it feels too cool.


Stop when the rock is soft but firm on the surface, and it has clearly shrunk to about 70% of the original size.  Rinse in cool water and squeeze to remove soap and let air dry.


Monday, April 8, 2019

Little Felt / Fibre Art

Here I have a few small felt art pieces to show....  The first is from my latest 2D / 3D art workshop, where students first made a wool "painted" picture of flowers in a field, then made a small vessel decorated to match the picture.  You can see one picture has a bee in the sky and a bee vessel.  These were made by a new student, who had never made any felt before! 
Next is a small house and sheep wool "painting" using wool fibre, and prefelts, then wet felted, then needle felted and machine stitched to bring out the details.  Sweet.
The last three show the reverse order: Finished picture after embellishments with machine stitching and needle felting, Finished felted only piece, drying and waiting for further embellishing, and the bottom photo is the fibre layout, with prefelts, loose wool fibre, and silk fibres and yarn (just before I wet it and felted it to a firm solid piece of fabric).


I am totally enthralled with pictorial fibre art, and will be making several of these to be offered for sale in some of my upcoming artisan shows. 

Tuesday, April 2, 2019

Photos of works in progress


I have been busy in my studio, creating felt scarves and coats and vests, all in an effort to have enough inventory for the Handmade Christmas Market coming in November to the Scotiabank Centre in Niagara Falls.  I have a large booth for three days of intense sales!

So here are a few photos of work in progress....  The back of a nuno felt vest:

A bright silk hankie lined cocoon:
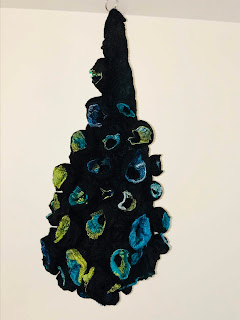
A series of photos of a wall mounted art piece, destined for entry in Felt: Feutre Canada exhibition.


Close up of thick nuno felt fabric that will become a new coat....


Just a little eye candy as inspiration for other felters.... keep your hands and your fibre wet!  Keep felting!